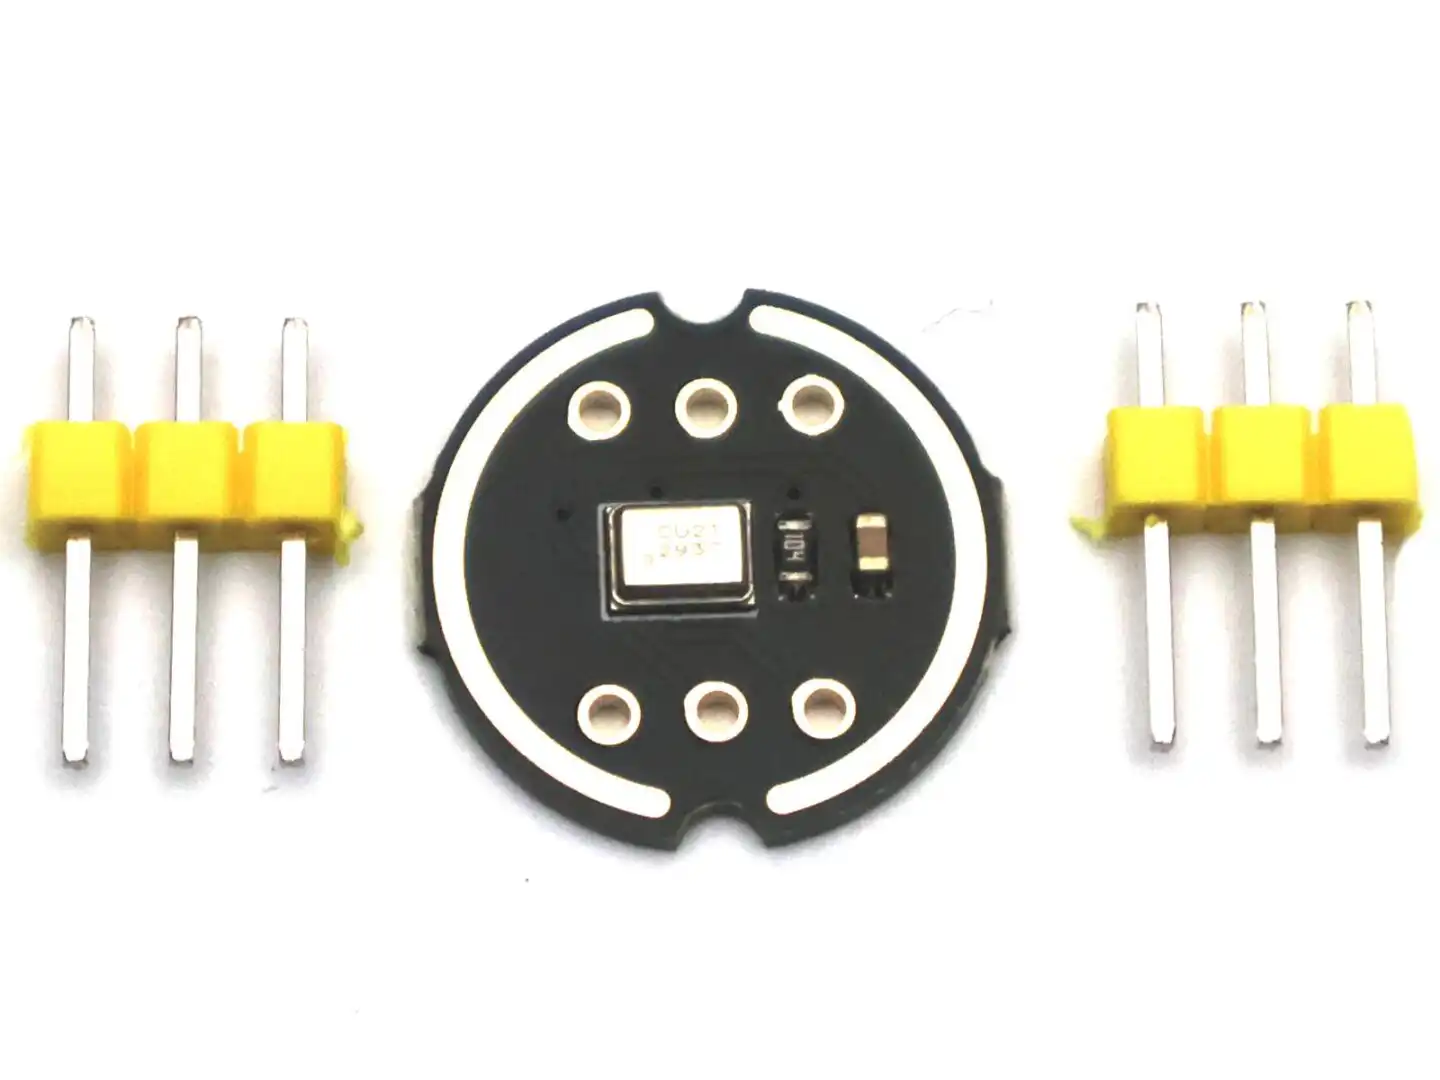
The INMP441 is not a typical analog microphone module. Instead of outputting an analog voltage that you can read with analogRead(), this module already contains a built-in amplifier and ADC and sends digital audio data over an I2S interface.
This means you will use it differently than common analog microphone modules.
What you need to use this module
To use this microphone, you need a controller that supports I2S audio input.
Recommended platforms:
- ESP32 (best and easiest option)
- ESP32-S3 / ESP32-C3
- Raspberry Pi
- Arduino-compatible boards with I2S support (e.g. some SAMD boards)
Not recommended:
- Arduino Uno, Nano, Mega (no native I2S support)
Important: No special library required
You do not need a dedicated “INMP441 library”.
Instead, you use:
- the I2S library of your Arduino-compatible board, or
- the built-in I2S peripheral (ESP32), or
- the Linux audio system (Raspberry Pi)
The microphone simply outputs digital audio data — your controller handles everything else.
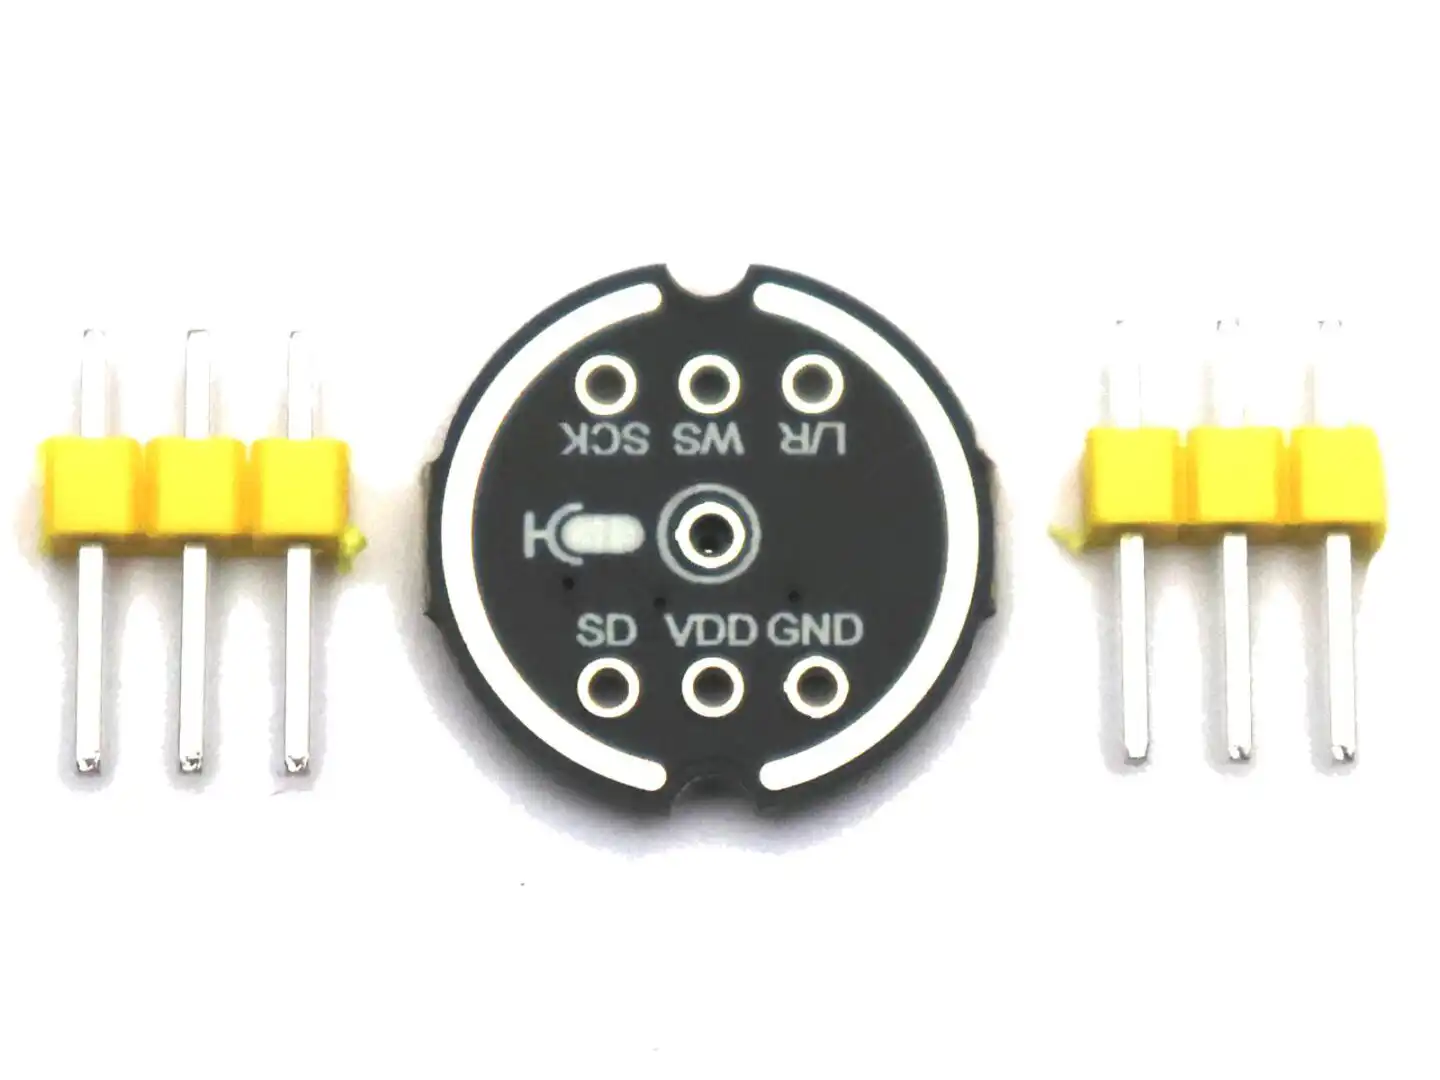
How to connect the module
Connect the pins as follows:
- VDD → 3.3V
- GND → GND
- SCK (BCLK) → I2S clock pin
- WS (LRCLK) → I2S word select pin
- SD → I2S data input pin
- L/R → GND or 3.3V
The L/R pin selects the audio channel:
- GND = left channel
- 3.3V = right channel
This allows you to use two microphones on the same data line if needed.
How it works (simple explanation)
Once connected, your microcontroller will:
- Generate the I2S clock signals
- Receive a continuous stream of digital audio samples
- Process the audio data in software
The microphone delivers high-quality 24-bit digital audio data directly.
First steps (typical workflow)
To get started:
- Choose a board with I2S support (ESP32 recommended)
- Load an example for I2S microphone input
- Read audio samples from the I2S interface
- Print values to Serial Monitor or process them
What you can build with this module
You can use this microphone for many projects, for example:
- Sound level meter
- Clap detection
- Voice activity detection
- Audio recording (e.g. to SD card)
- FFT / spectrum analyzer
- Smart home sound triggers
- Wireless audio streaming (ESP32 + WiFi)
Using it with ESP32 (recommended)
The ESP32 has excellent I2S support and is the easiest platform to use with this module.
Typical wiring example (can vary depending on your setup):
- SCK → GPIO26
- WS → GPIO22
- SD → GPIO21
You can then use the ESP32 I2S functions to read audio data directly.
Using it with Raspberry Pi
On a Raspberry Pi, you connect the module to the I2S pins and enable the I2S audio interface in the operating system.
After setup, you can:
- record audio using Linux tools
- process audio using Python or other software
Important notes
- This module works with 3.3V only
- It does not output analog signals
- It requires an I2S-capable controller
- It continuously streams audio data (not single readings like sensors)
Summary
If you are used to simple analog sensors, this module is a bit different. Instead of reading a voltage, you receive a stream of digital audio data.
Once set up, however, it gives you much more flexibility and audio quality, making it ideal for advanced sound-based projects.

Reviews
There are no reviews yet.